
The Ultimate Guide to Cooking with Dry-Aged Beef
Dry-aged beef is a culinary delight that brings a rich, intense flavor and tender texture to your dining experience. At SteakAger, we specialize in providing the tools and knowledge to help you create the perfect dry-aged beef at home. Whether you're a seasoned chef or a home cooking enthusiast, understanding how to cook with dry-aged beef can elevate your meals to new heights. In this guide, we'll explore the essentials of preparing and cooking with dry-aged beef to ensure you make the most out of this exquisite ingredient.
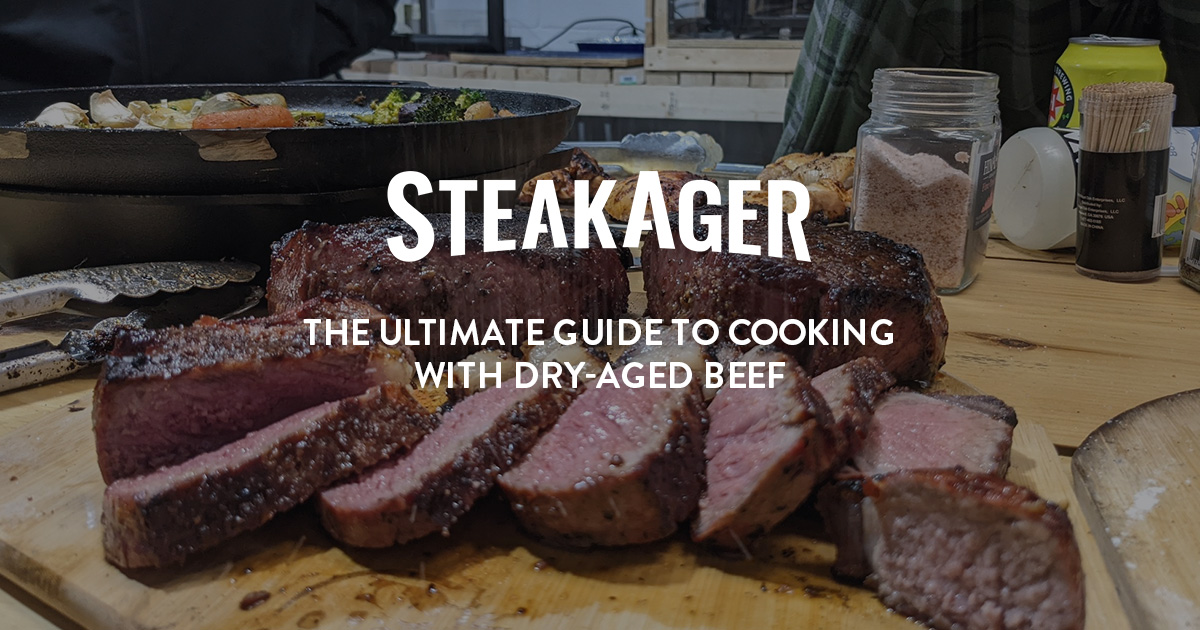
Dry-aged beef undergoes a unique aging process where it is stored in a controlled environment for several weeks. This process allows enzymes to break down the muscle fibers, resulting in a more tender texture and concentrated flavor. The first step in cooking with dry-aged beef is selecting the right cut. Popular choices include ribeye, strip loin, and T-bone steaks, known for their marbling and rich taste. Once you've chosen your cut, it's essential to bring it to room temperature before cooking. This ensures even cooking and helps retain its natural juices.
Tips for Cooking with Dry-Aged Beef
- Season Simply: Dry-aged beef has a robust flavor profile, so simple seasoning with salt and pepper is often all you need. Avoid overpowering marinades and spices.
- Use High Heat: Sear the steak over high heat to create a flavorful crust while keeping the inside tender and juicy.
- Monitor Cooking Time: Dry-aged beef cooks faster than regular beef due to its lower moisture content. Keep a close eye on your steak to avoid overcooking.
- Let it Rest: After cooking, let the steak rest for at least 5 minutes. This allows the juices to be redistributed, ensuring a juicy and flavorful bite.
- Use a Meat Thermometer: To achieve the perfect doneness, use a meat thermometer. Aim for 124°F and pull for medium-rare. Dry-aged beef contains very little water, therefore cooks faster than a traditional method.
When cooking dry-aged beef, the method you choose can significantly impact the final result. For a classic approach, pan-searing followed by oven finishing is a great technique. Start by preheating your oven to 400°F. Heat a cast-iron skillet over high heat and add a bit of oil. Sear the steak for 2-3 minutes on each side until a golden-brown crust forms. Then, transfer the skillet to the oven and cook for an additional 5-7 minutes or until the desired doneness is reached. This method ensures a perfect crust while the inside remains tender and flavorful.
Start Your Dry-Aging Journey with SteakAger and Elevate Your Culinary Creations
Ready to experience the incredible taste of dry-aged beef at home? At SteakAger, we offer the perfect tools to start your dry-aging journey, from professional-grade dry-aging units to expert tips and recipes. Visit our website to explore our range of products and discover how easy it is to create restaurant-quality dry-aged beef in your kitchen. Transform your cooking and impress your guests with the unparalleled flavor and tenderness of dry-aged beef. Order your SteakAger today and start enjoying the ultimate steak experience! Give us a call at 1-800-768-0617 or email through our secure contact form with questions on how to get started.